


Match your monitor to the way the video will be delivered, whether that means a web MP4, office presentation, live stream, gaming capture, HDR master, or archive review.
Does your 4K export look crisp on your editing monitor but washed out after upload, cropped on a phone, or strangely jerky on a conference-room screen? A focused display setup pass can reveal aspect-ratio errors, motion mismatch, brightness drift, and compression artifacts before the audience sees them. Here is a practical workflow for aligning screen settings with the delivery format.
Start With the Delivery Target, Not the Monitor Menu
A display setting is only correct if it helps you judge the file viewers will receive. A creator reviewing a video-platform upload, a product team preparing a sales demo, and a competitive gamer checking 60 fps capture should not use the same monitor profile, even if they own the same screen.
The safest first question is simple: where will this video live? For general web publishing, MP4 remains the practical default because MP4 balances high video quality with smaller file sizes and broad compatibility across websites and major video platforms. That matters because your monitor should be set to judge the compressed delivery file, not only the pristine editing timeline.
A high-quality MOV or ProRes-style master can be excellent for archive and editing review, but it is not the same as the final web file. In hands-on review work, the biggest avoidable mistake is approving color and sharpness from a master file, then never checking the actual compressed MP4 that gets uploaded.
Match Resolution to the Final Pixel Grid

Resolution controls how many pixels the video contains. If the delivery file is 1920 x 1080, review it on a display mode that lets you see 1080p cleanly without unnecessary scaling. If it is 3840 x 2160, use a true 4K monitor or at least verify it at 100% scale on a 4K-capable screen before signoff.
For 16:9 video-platform delivery, content should keep its native aspect ratio, and a major platform recommends at least 1280 x 720 for general 16:9 uploads, with 1920 x 1080 or higher used when quality expectations are higher. The display takeaway is direct: set your monitor to its native resolution, avoid stretched preview windows, and check the video in the same aspect ratio it will be delivered.
A practical example: if a 1080p product demo is reviewed full-screen on a 1440p monitor, the player scales it upward. That can make compression blocks look softer than they really are or make text appear less sharp than it will on a native 1080p display. For interface-heavy videos, open the file at 100% size at least once, then full-screen it to judge normal viewing comfort.
Delivery Format |
Best Review Display Setup |
What to Watch For |
1080p web MP4 |
Native monitor resolution, 100% preview check |
Text clarity, compression noise, edge sharpness |
4K video-platform upload |
4K-capable display or 100% pixel inspection |
Fine detail, bitrate stress, scaling artifacts |
Vertical short video |
Portrait preview or rotated secondary display |
Cropping, safe area, captions, UI overlap |
Office presentation video |
Typical laptop or conference display |
Readability from distance, brightness, audio sync |
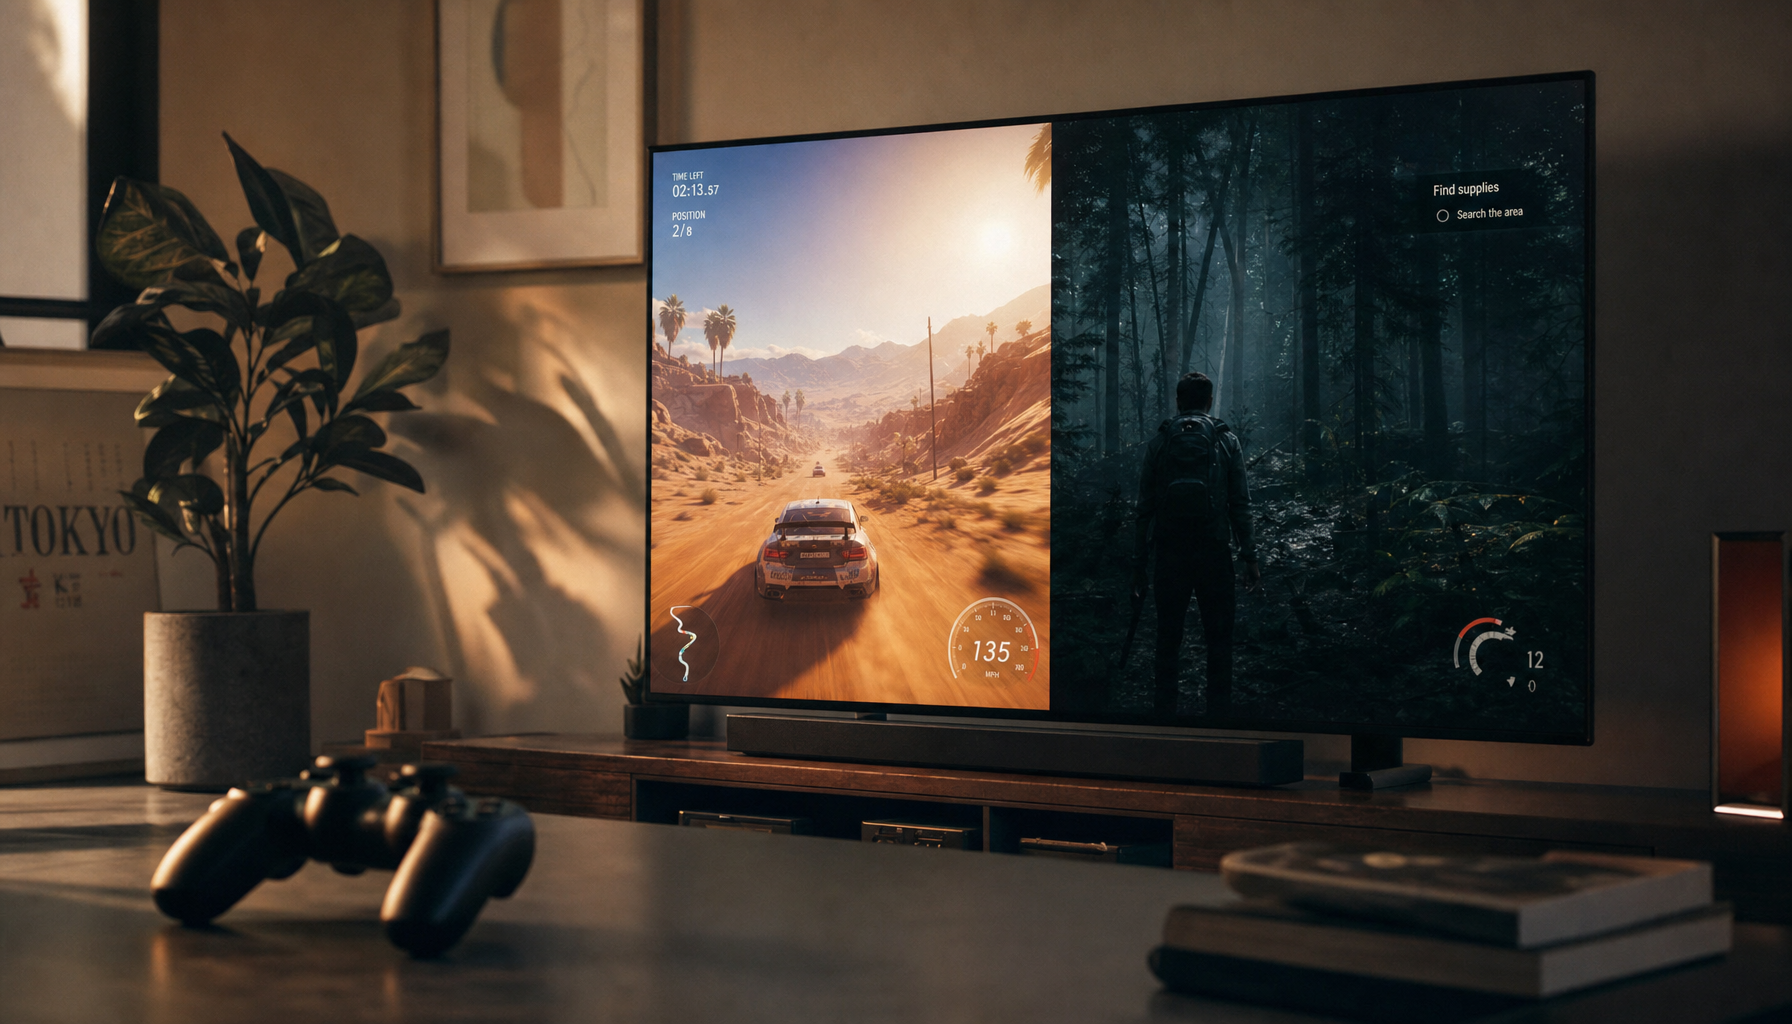
Gaming capture |
High-refresh display plus native fps review |
Motion clarity, tearing, ghosting, HUD sharpness |
Align Refresh Rate With Frame Rate
Frame rate is the number of video frames shown per second, while refresh rate is how often your monitor updates. They are related, but they are not the same. A 60 fps gaming clip can look uneven on a monitor stuck at 30 Hz, and a 24 fps cinematic video can look strange if motion smoothing or aggressive display processing is enabled.

For gaming and fast action, a monitor should expose the motion that the video actually contains. Gaming monitor guidance commonly treats refresh rate as a core performance spec because higher refresh rates reduce stutter and improve perceived smoothness. If your video delivery is 60 fps, review it on a display running 60 Hz, 120 Hz, 144 Hz, or higher, not an accidental 30 Hz desktop setting.
For office video, webinars, and talking-head content, 30 fps is usually easier to deliver cleanly and does not need an esports-class refresh rate for approval. For screen recordings, match the capture and timeline frame rate closely; mismatches can create cursor judder, uneven scrolling, or subtle timing issues that make a polished tutorial feel cheap.
Set Color Mode for the Audience Device
Color mode is where display confidence often breaks down. A wide-gamut gaming monitor can make a standard web video look richer than it will appear on most office laptops. An HDR monitor can make SDR content look too bright if the operating system maps it poorly. A dual-monitor setup can trick you when the same clip looks warm on one screen and cool on the other.

For standard web delivery, use an sRGB-like or standard color mode when available. Many gaming monitors include vivid presets that look exciting for play but are not reliable for video approval. Use the vivid or racing-style mode when judging entertainment punch, but switch to the accurate or sRGB mode when checking brand colors, skin tone, UI colors, and product footage.
Calibration matters because monitor calibration helps ensure more consistent brightness and color decisions across workflows. In a real desk setup, a practical baseline is to set white point around the neutral daylight target used for video work, then match brightness by viewing a full white or neutral gray screen across every display you use for review.
Tune Brightness and Contrast for the Viewing Environment
Brightness is not just comfort; it changes your editing judgment. If your monitor is too bright in a dim room, you may darken the video too much. If it is too dim in a sunlit office, you may over-brighten shadows and create a washed-out upload.
For productivity desks, monitor placement and room lighting matter as much as the monitor menu. A good home office setup keeps the top of the screen around eye level and uses adequate lighting to support focus without glare. That ergonomic detail also improves review accuracy, because you are looking straight at the panel instead of judging color and contrast from an angle.
A simple field test works well: play the final encoded file, then pause on a face, a dark scene, a white slide, and a saturated brand color. If the face looks natural, shadow detail is visible without gray haze, white slides do not bloom, and brand colors do not glow unnaturally, your display is close enough for most delivery checks.
Choose the Right Preset for the Job
Monitor presets are shortcuts, not truth. Gaming modes usually prioritize motion visibility and low latency. Office modes often prioritize comfort and text. sRGB modes prioritize color restraint. HDR modes only make sense when the delivered video and playback chain are actually HDR.
For competitive gaming capture, use the monitor’s high-refresh mode, enable adaptive sync when relevant, and tune overdrive carefully. Excessive overdrive can create inverse ghosting, which may make a capture review look cleaner or worse than the audience experience depending on where the artifact is introduced. For office productivity videos, a stable 60 Hz or 75 Hz display with accurate color is usually more useful than an aggressive gaming preset.
For portable smart screens, prioritize native resolution, correct orientation, and brightness stability. These displays are often used as travel review monitors, client preview screens, or second displays for vertical content. The best test is not a synthetic pattern; it is the actual final file played from the device or platform the audience will use.
Account for Compression Before You Approve Sharpness
Compression changes what your monitor shows. MP4 can be efficient, but smaller files trade away some image detail. Fast movement, detailed textures, particle effects, game foliage, and screen-recorded text all stress compression harder than a static interview shot.

That is why the final review should include the delivery encode, not only the editor preview. Major video platforms re-encode uploads, so the uploaded file may look different from the local MP4. When the platform will compress again, upload the best-quality practical file and review the processed result before publishing anything mission-critical.
A useful rule from production practice is to test the hardest 20 seconds of the video. Choose the fastest camera move, densest gameplay moment, busiest spreadsheet view, or most detailed product close-up. If that segment survives compression, the calmer parts usually will.
Practical Format-to-Display Workflow
The clean workflow is to export for the destination, set the monitor to its native resolution, choose the closest accurate color preset, match refresh rate to the video’s frame-rate needs, and review both the local file and the platform-processed file when possible. This is faster than chasing every monitor option because it starts from the audience experience.
For a 1080p tutorial, use MP4 with H.264 and AAC audio, review at native resolution, check 100% text clarity, and keep the monitor in a standard or sRGB mode. For a 4K product showcase, use a 4K display for final sharpness approval, avoid judging only from a scaled preview, and inspect motion-heavy sections after upload. For a gaming montage, run the monitor at a high refresh rate, confirm the file’s frame rate, and look for tearing, blur, and compression breakup in fast scenes.
FAQ
Should I review every video on a 4K monitor?
No. A 4K monitor is valuable for 4K delivery and detailed visual work, but it can hide how a 1080p file feels on common screens. For 1080p web video, a native 1080p or properly scaled review is still important.
Is MP4 always the best format?
MP4 is the best default for web delivery because it is widely supported and efficient. MOV, AVI, MKV, AVCHD, and other formats still have roles in editing, archiving, broadcast, or specialized workflows, but they are usually not the simplest final format for general viewers.
Should HDR stay on all the time?
Only if your workflow and content support it cleanly. SDR videos can look wrong on an HDR desktop if brightness and color mapping are poorly managed, so compare the final file in the mode your audience is most likely to use.
Final Screen Check
A strong display setup does not make the video better by itself; it makes your judgment more reliable. Match the screen to the delivery format, review the encoded file, and let the audience’s real playback path decide which monitor settings matter.


